Hydraulic Clutch
Legacy Blog Content!
You are viewing legacy content from The Art of Diesel’s blog site. Information and links may be outdated. Referenced video might no longer exist. Embedded photos might be missing. We are keeping this content available to our readers in case there might still be some valuable information contained.
******************************
Current Status: I haven’t been blogging the way I’d like to this weekend, but I’ve been making excellent progress on the actual project. I actually cranked the engine at around noon, and it almost started. Then I realized that I need to make some modifications to the fuse/relay center under the hood. I can hear the fuel pump priming for a few seconds when the key is turned to the “on” position, but of course it shuts off when the ECU doesn’t see a running engine. As my kids say, “Derp!” This is to avoid the potentially dangerous situation of pumping fuel onto the ground after a car accident. I’d also forgotten to bleed the injection pump. I’ll post videos as soon as I get it started and can putt around the driveway a bit (maybe when things cool down tonight?). I’m waiting for my intake system components, so I’ll hold off on doing much running/driving until the air entering the turbo is properly filtered. Now, for this post: In recent posts I discussed the transmission and transfer case decisions and modifications I made when building this vehicle up. In this post I’ll provide detail on how I made the clutch work.
Conveniently, the firewall had a location marked to drill for the clutch master cylinder. First, it should be noted that the Suburban shares the same firewall (and many other components) with the full-sized GM pickups. Even though I’m not aware of any Suburbans that actually shipped with manual transmissions, next to the brake master cylinder and under the cruise control module I found the stamped-in place for the clutch master cylinder to be mounted. There wass a large, depressed circle with two smaller circles on either side. On the reverse side of the firewall, I pulled back some insulation to find a bare piece of firewall with no components in the way. I also found that one of the clutch pedal assembly mounting studs were present.
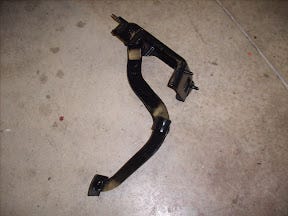
The clutch pedal assembly was refurbished and ready for use.
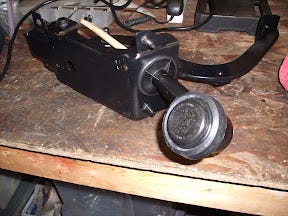
I had previously purchased a used clutch pedal assembly. So, I cleaned it up and gave it a fresh coat of paint. I had also purchased a master cylinder, and trial-fitted it to the pedal assembly. I had been concerned that I needed another bracket to mount the master cylinder. I found out that the clutch assembly has a square mounting hole, while the master cylinder has a set of tabs that form a rotated square on the back of it. The master cylinder’s back-end goes into the square at an angle, and the assembly is simply rotated upright to lock it in place. The pushrod simply snaps into the back of the master cylinder and onto a knob on the side of the clutch pedal arm. This is very clever, and simplified my installation. Certainly, this made things faster on the assembly line, too, but I’m happy for anything that makes something go faster on this 3-month15-month project.
The master cylinder fits into the square opening on the clutch pedal assembly, and is then rotated upright (to the left, in this orientation) to lock it in place. I did some basic measurements to ensure that everything would line up, and the results looked good. So, I cut out the holes in the firewall. I used a combination of a drill with an extension, a Harbor Freight air nibbler (awesome tool, for the price), and a rotary tool (a Kawasaki Dremel-clone — a great tool, by the way!) with a sanding drum to cut the hole out and get the cut all the way to the edge of the firewall impression. Getting the entire circle cut out is necessary to clear the gasket on the back of the master cylinder assembly. Likewise, I drilled the stud holes where the indents were in the firewall. I spent some time crawling around under the dash, moving wiring harnesses and other components around to make room and figure out the best way to mount the pedal assembly without pinching wires or causing any other problems. It took some work, but these components are designed to work together. I got it into position, but before I bolted it into place I hit the area where the assembly would touch the firewall with some RTV–so that moisture wouldn’t find its way into my lovely, like-new interior. I wouldn’t be surprised if GM uses a gasket in this location. Then I installed the nuts and tightened them.
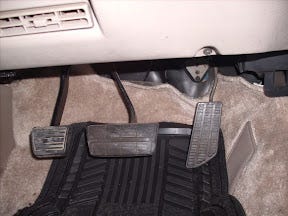
The newly installed clutch pedal sits alongside the brake pedal — if there are interference or driver confusion issues, I’ll trim the brake pedal. I thought the brake pedal would need some trimming, but the clutch pedal sits nicely alongside it. I’m going to try this geometry out before I make any further modifications to it. Sitting in the driver’s seat, it seems that I might bump the brake when reaching for the clutch with my left foot, but I’ll see if this is really going to be an issue. I needed a pressure hose to connect this GM master cylinder to my Isuzu slave cylinder. Obviously, this wouldn’t be an off-the-shelf part, so I contacted a local shop that fabricates custom pressure lines. I brought them the OEM plastic line that came with the transmission so that they could see the fitting on the master cylinder end. I also brought in the slave cylinder, so that they could figure out what would fit. I gave them the line length I needed, and they took care of the rest. If one prices the plastic GM line, it will be found to cost around $110.
This stainless line was custom-made to my specifications by a local shop — shown with slave cylinder and old (plastic) line. This custom, stainless-wrapped unit cost me $72, which still felt like highway robbery, but it’ll probably last forever. I routed it between the wiring harnesses by the firewall, and found that it would have been easier to have an L-bend on the master cylinder end — especially as I had to reinstall the master cylinder by twisting it back into the firewall. The arc of the straight extension on the bottom of the master cylinder made this maneuver difficult. I used the o-ring and roll pin that came with the master cylinder to mount the line on that end.
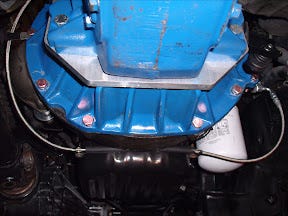
The slave cylinder was installed with the new line, and we were ready to bleed the system. On the other end, I bolted the slave cylinder into place and hooked up the line. Because the slave cylinder is on the “wrong” (right-hand) side of the bell housing, the line ran under the engine. To ensure that rocks, roadkill, and hapless pedestrians didn’t take out my clutch line, I connected it to the existing brackets on the bottom of the engine using some metal straps and some bolts that were the right size. I’m not sure what these were used for on the Isuzu NPR trucks, but they were sure useful for me. I also split a piece of fuel line lengthwise and slipped it onto the line so that it wouldn’t scrape on the oil pan.
The line was mounted to the bottom of the engine to keep it from hanging too low — existing brackets on the oil pan were used. My son helped bleed the hydraulic clutch. I told him to pump the pedal on the left. I heard a ratcheting sound and he said the pedal wouldn’t come back up. I took a look inside the cab and found he’d set the parking brake! I clarified my instructions and we resumed the bleeding procedure. After a few iterations of pumping, holding, loosening and tightening the bleed valve, I realized that we didn’t seem to be moving the fluid at all. I thought we had an air bubble in the master cylinder. I asked my son if the pedal was getting any firmer, because it wasn’t moving the fork, either. He said the pedal was just hanging. Then, I realized I hadn’t reconnected the pushrod! After that, the bleeding process went smoothly, and the clutch was actuating properly. -My recipe for success: free markets, more diesel, and less government!


